(This is an updated version of a thread I originally posted on GBAtemp in March 2021.)
The current method for dumping a Wii U kiosk system (CAT-I, CAT-SES) requires using a hardmod to dump the eMMC, then using Recovery Mode to install SDK 2.13.01 and dumping the keys. It turns out that, if the kiosk system has a recent enough firmware, it’s possible to dump the eMMC (and SLC, etc) without any hardware modifications.
The Wii U operating system (IOSU) includes a debug logging facility (enabled on devkits only) that logs debug output to two places:
- Ethernet (CAT-DEV only)
- USB Serial (CAT-DEV, CAT-R Reader, CAT-I Kiosk, CAT-SES Kiosk)
In addition to simply logging debug information, the serial console can be used to run a limited set of commands in the cos shell, as long as the system is in Development (not Production) mode. It turns out that, on recent enough firmware versions, there’s a cos shell command to launch a title, and this can be used to launch System Config Tool.
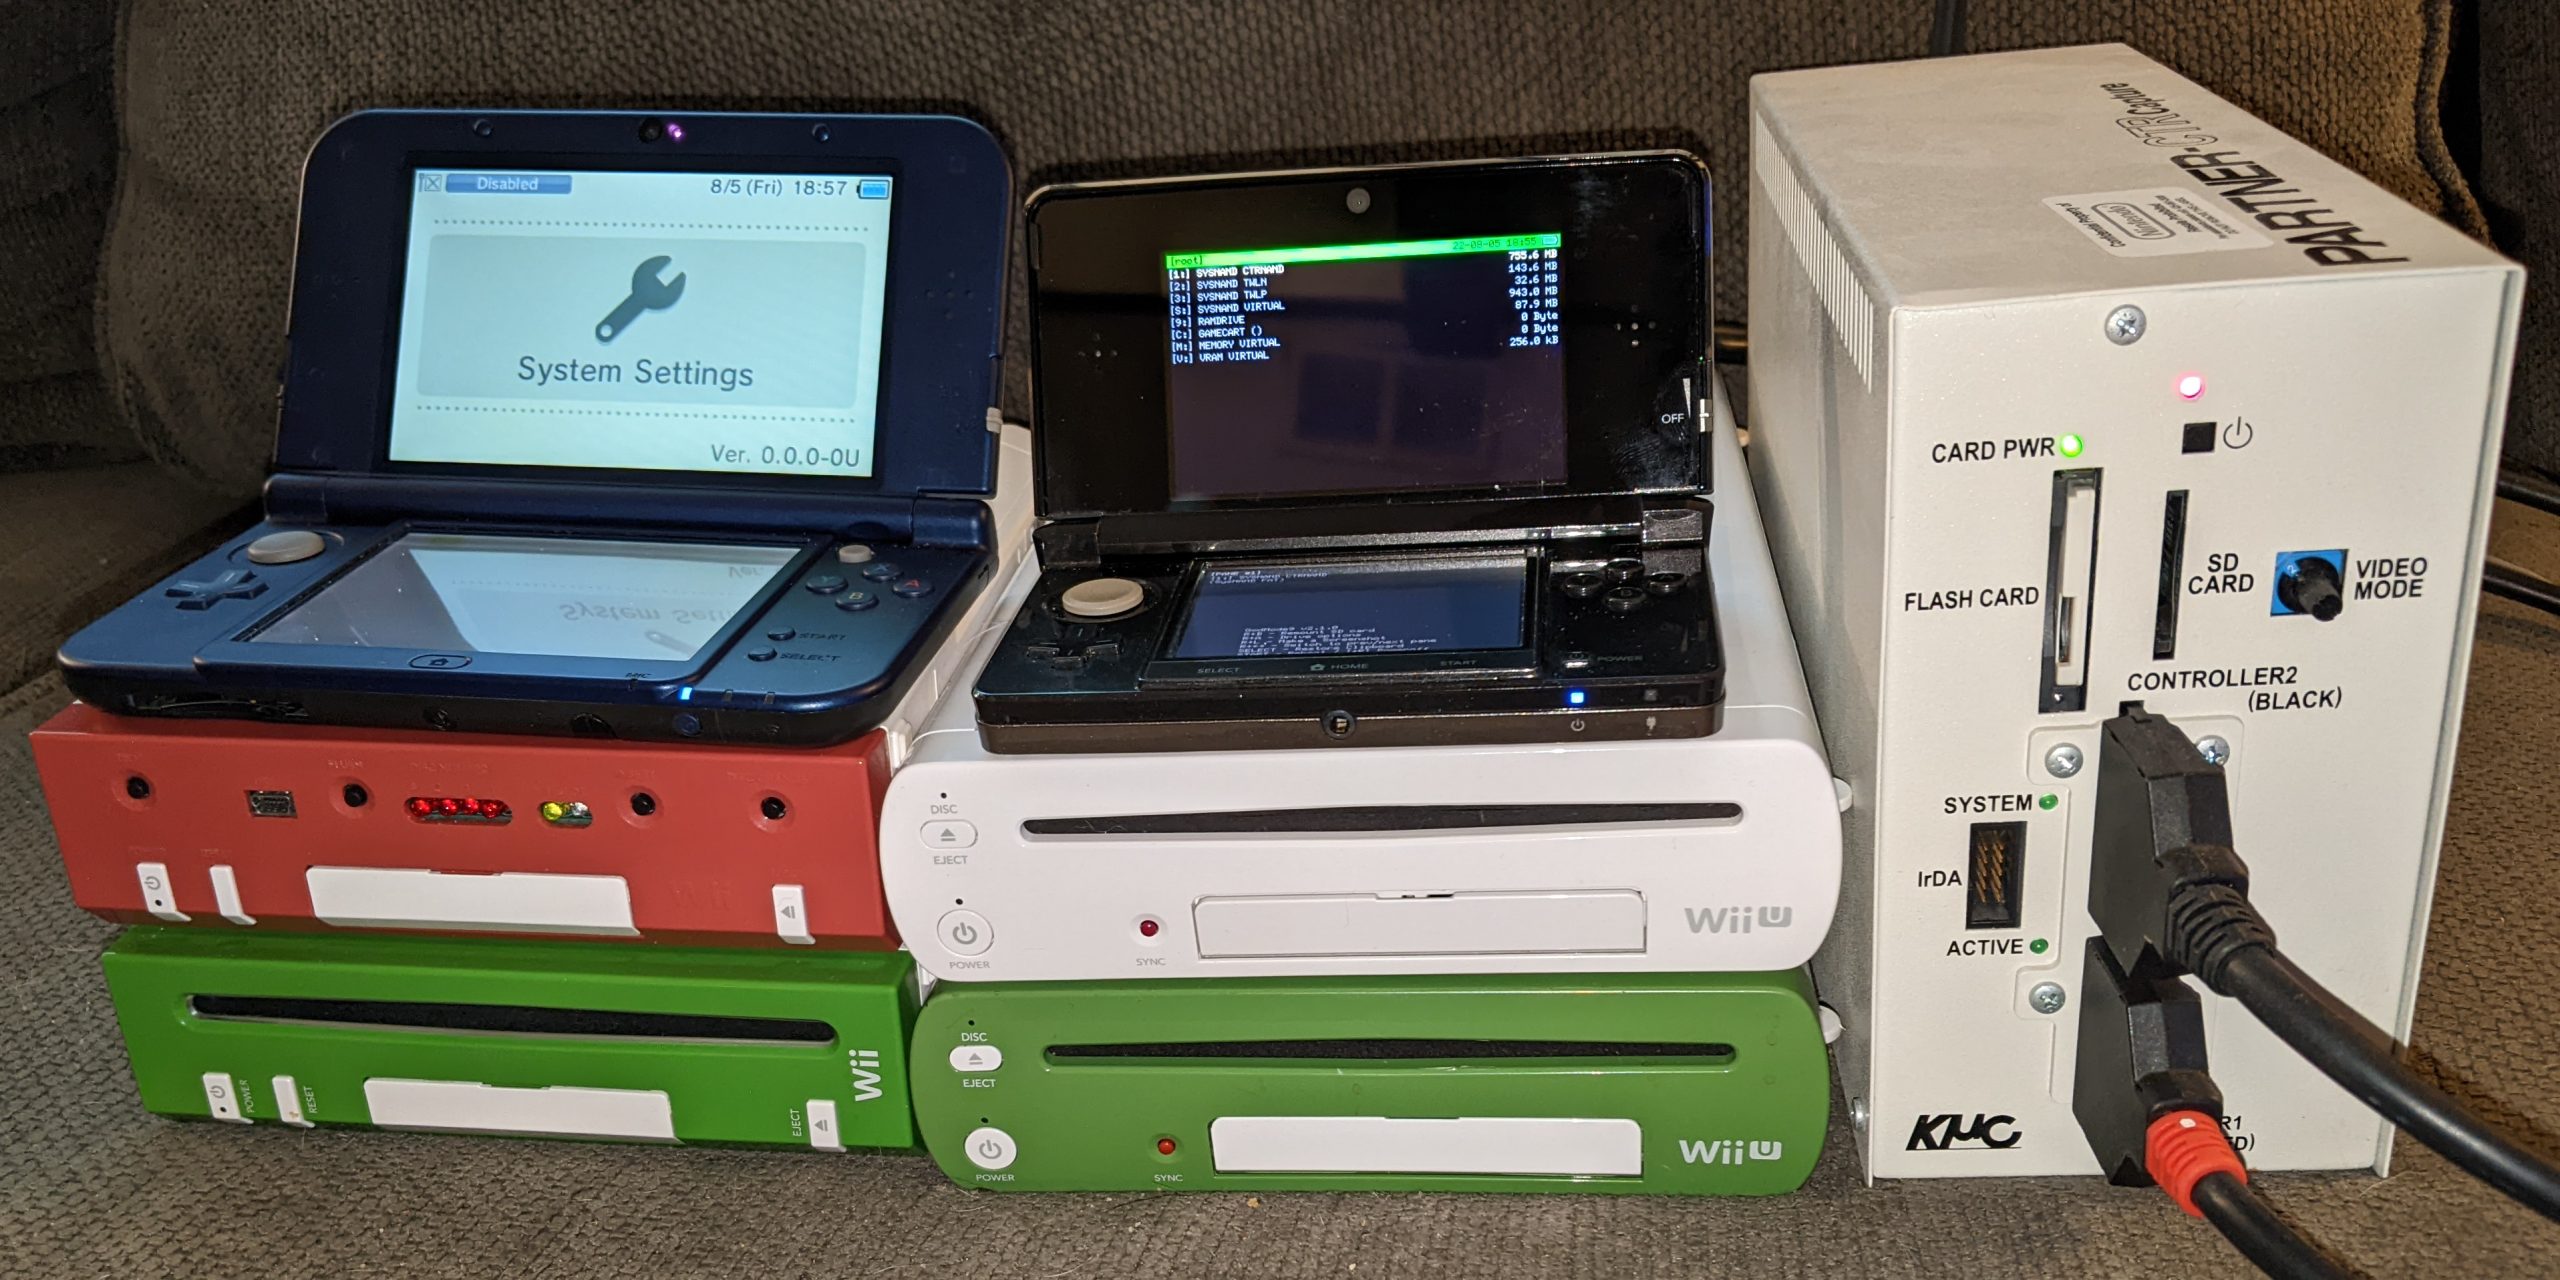
Devkit models, in case you’re unfamiliar with them:


A description of the above systems, from left to right:
- CAT-I: Disc-based kiosk system. Usually has a white Wii U chassis.
- CAT-DEV: High-end debugging system in a metal case. This system has PC connectivity over Ethernet. (Also shown is a DRC-DK-MP development gamepad.)
- CAT-R Reader: Standard test system, with limited debugging capabilities. Looks like a white Wii U with a green faceplate.
- CAT-SES: HDD-based kiosk system. Usually has a black Wii U chassis. The two front USB ports are used by the internal HDD.
This guide is generally not needed for CAT-DEV or CAT-R units, but it should work with them regardless.
Preparations
You will need the following:
- Wii U development console (CAT-DEV, CAT-R, CAT-I, CAT-SES)
- SD card (64 GB or larger, formatted as FAT32)
- USB serial cable with FTDI FT232 chipset
- Debug-signed version of Homebrew Launcher for Wii U
- Wii U NAND Dumper
- TeraTerm Pro, or similar serial terminal program
Serial cables known to work with Wii U’s debug logging:
- If you do not have a serial port on your PC:
- If you do have a serial port on your PC:
- Digitus DA-70156 USB to Serial adapter: https://www.amazon.com/gp/product/B0030IT780
- StarTech.com 10′ null modem serial cable: https://www.amazon.com/StarTech-com-10-Feet-RS232-Serial-SCNM9FF/dp/B00006B8BJ
- The important part here is the USB adapter, which connects to the Wii U, must have an FT232 chipset, since that’s the only chip supported by IOSU for debug logging.
Instructions
Serial Cable Setup
- Connect the USB serial cable to the Wii U and to the PC.
If using the USB-NMC-2.5M, connect one end to Wii U and one to PC.
If using a USB Serial adapter, connect the USB side to the Wii U, the null modem cable to the USB Serial adapter, and the other end of the null modem cable to the PC. - On the PC, open TeraTerm. Select Serial and select the COM port that corresponds to the serial cable, then click OK.
- In TeraTerm, click the Setup menu, then Terminal. Set New-line for both Receive and Transmit to CR+LF, then click OK.
- In TeraTerm, click the Setup menu, then Serial port. Select the COM port that corresponds to the serial cable, set the speed to 57600, then click the “New setting” button.
- Turn on the Wii U. In 5-10 seconds, you should start seeing debug messages printed on the console.
cos shell
To determine if the cos shell is working, type the following in the serial terminal, then press Enter:
cos sdkversionIf cos shell is working, and the system is set to Development mode, a message similar to the following will be printed:
cos sdkversion
# 00;01;55;243:
---- COS Debugging Shell Command: sdkversion ----
00;01;55;243: SDKVer:21301
In this example, the system has SDK version 2.13.01 installed. This is the latest version of the system software, which corresponds to Wii U menu 5.5.0.
WARNING: If anything other than 21301 is displayed, you must stop here for now. Both the dev-signed Homebrew Launcher and Wii U NAND Dumper only function properly with the latest version of IOSU, indicated as SDK 2.13.01. However, if the system is new enough, e.g. 2.12.12 or 2.12.13, it’s possible to update just the IOSU title to the latest version, but this requires a copy of the development version of IOSU. This is named os_v10_ndebug and may be found in the latest SDK and in newer CAT-I kiosk disc images. If you do in fact have 2.12.12 or 2.12.13 and a copy of os_v10_ndebug, you can continue to the next section.
Launch System Config Tool
To launch System Config Tool, run the following command in TeraTerm:
cos launch 0x00050010 0x1F700500This will result in one of the following:
- Nothing (just a ‘#’): The SDK version may be too old, in which case it doesn’t have a launch command. Unfortunately there’s no known workaround for this at the moment, other than dumping eMMC manually. (CAT-SES units may have SDK 2.09.xx, which doesn’t have the launch command.)
- Errcode -6: The specified title ID was not found. Make sure you entered it correctly. Note that some older firmware versions might have a different menu called
DEVMENUinstalled, andDEVMENUhas a different title ID. - System Config Tool will load. This is what we want!
If either #1 or #2 happens, you’ll need to stop here for now. You can post in the GBAtemp thread for support questions.
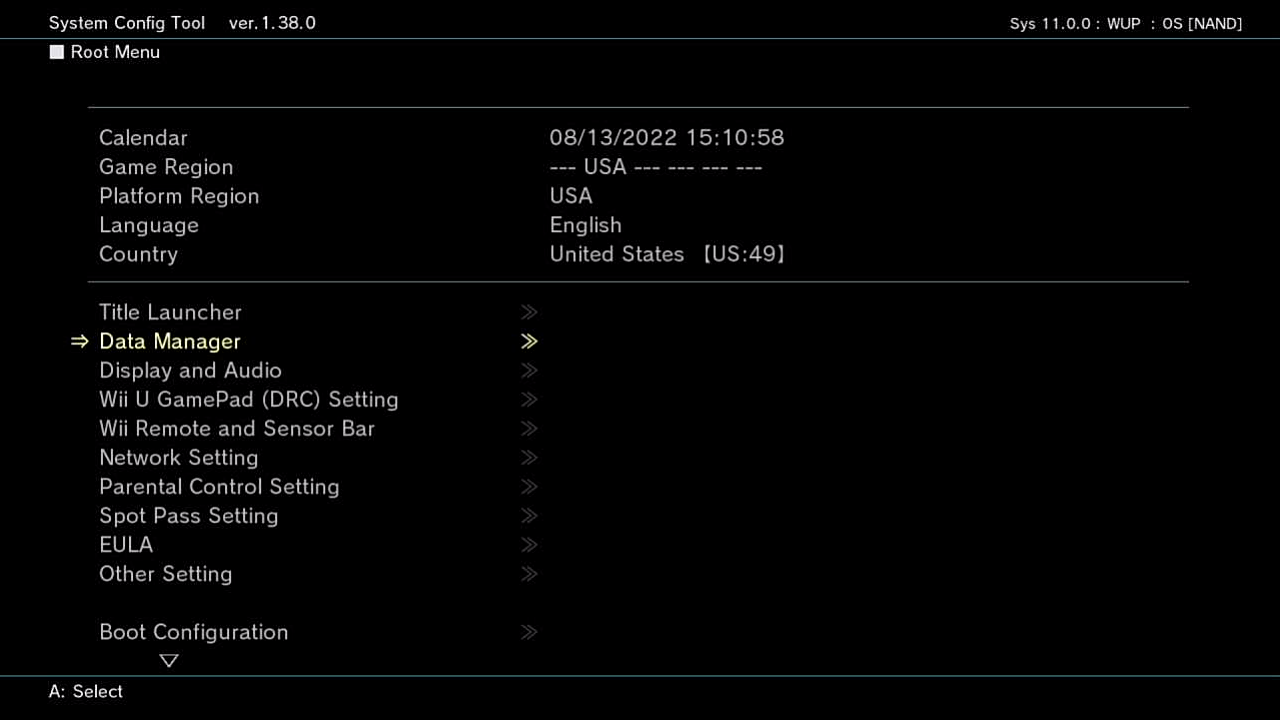
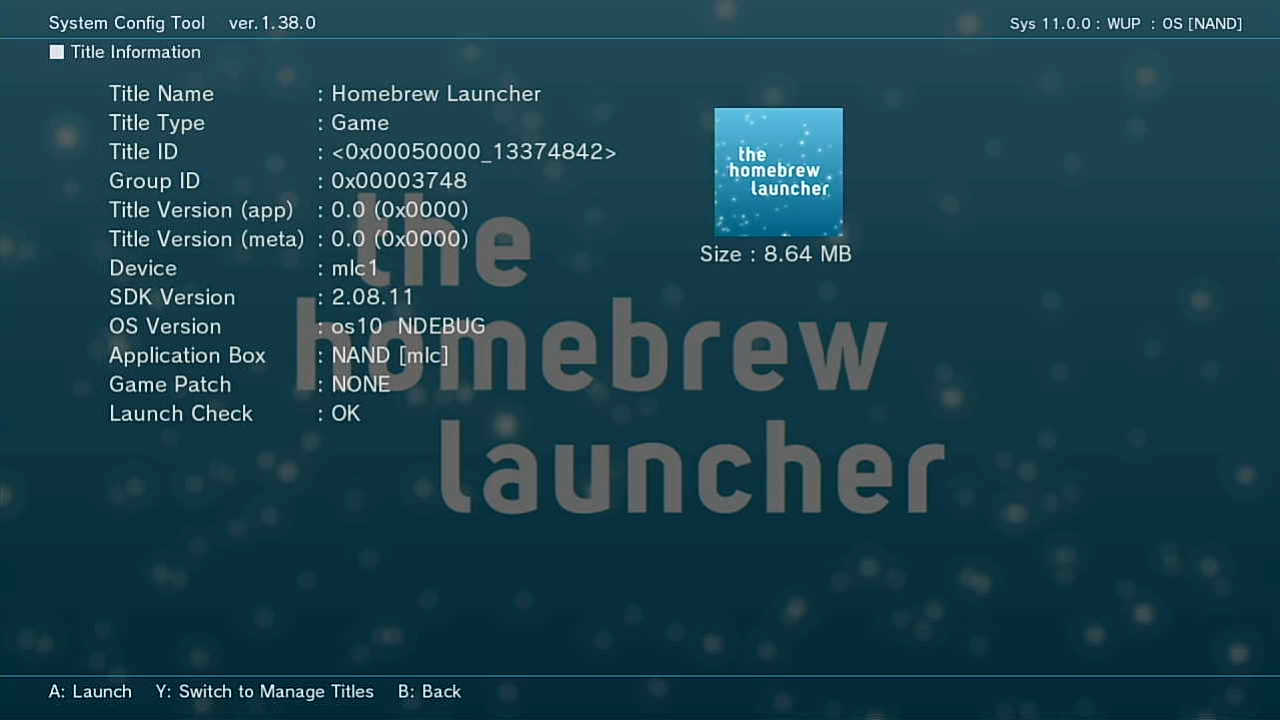
System Config Tool
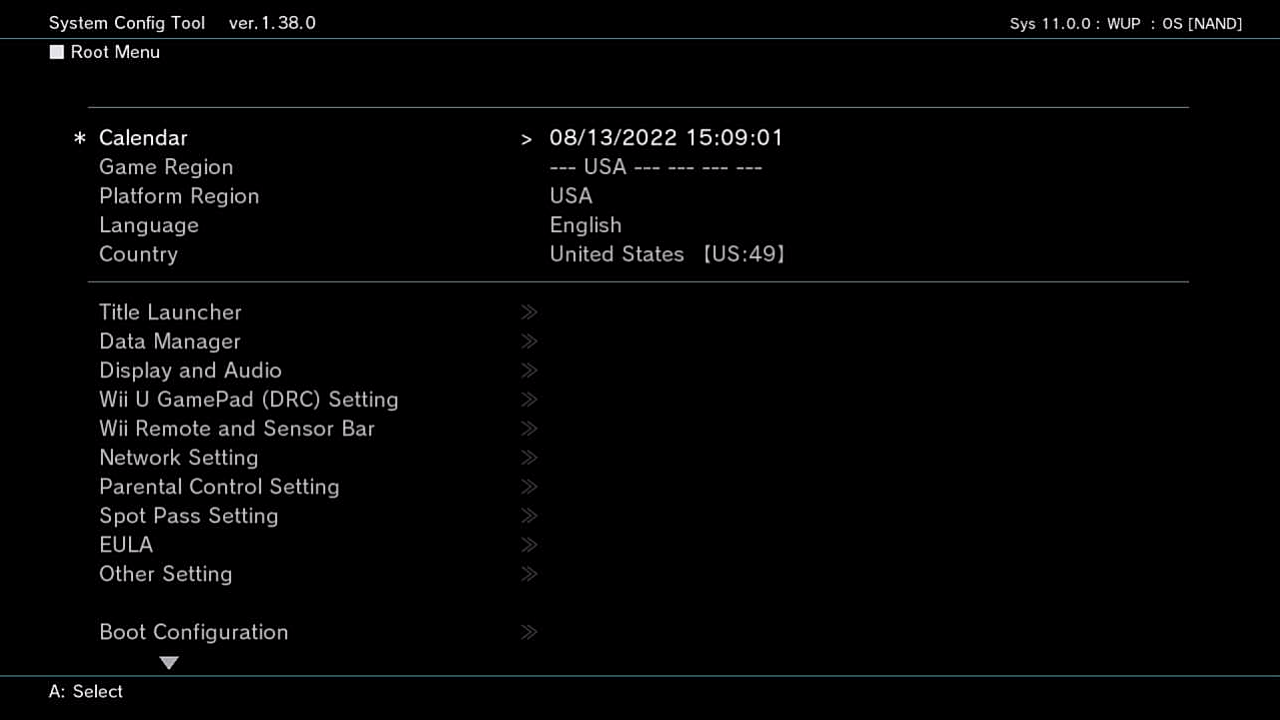
Set the default title to System Config Tool:
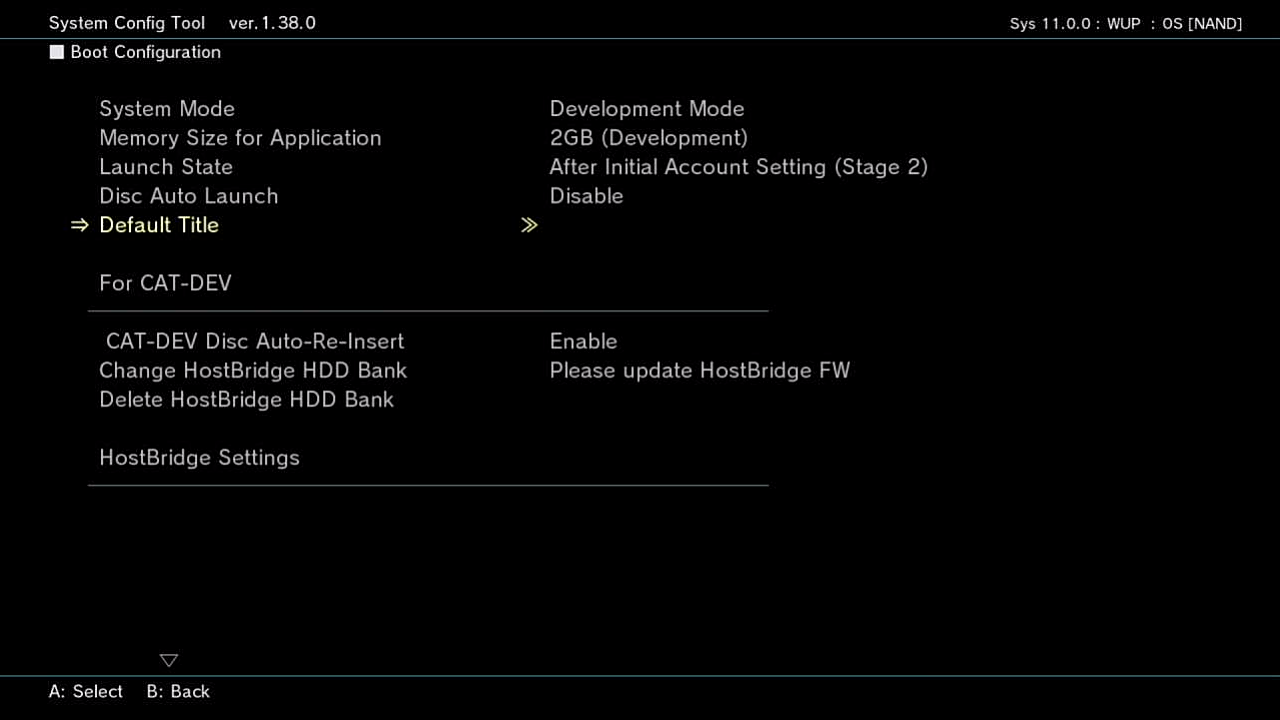
- Select Boot Configuration.
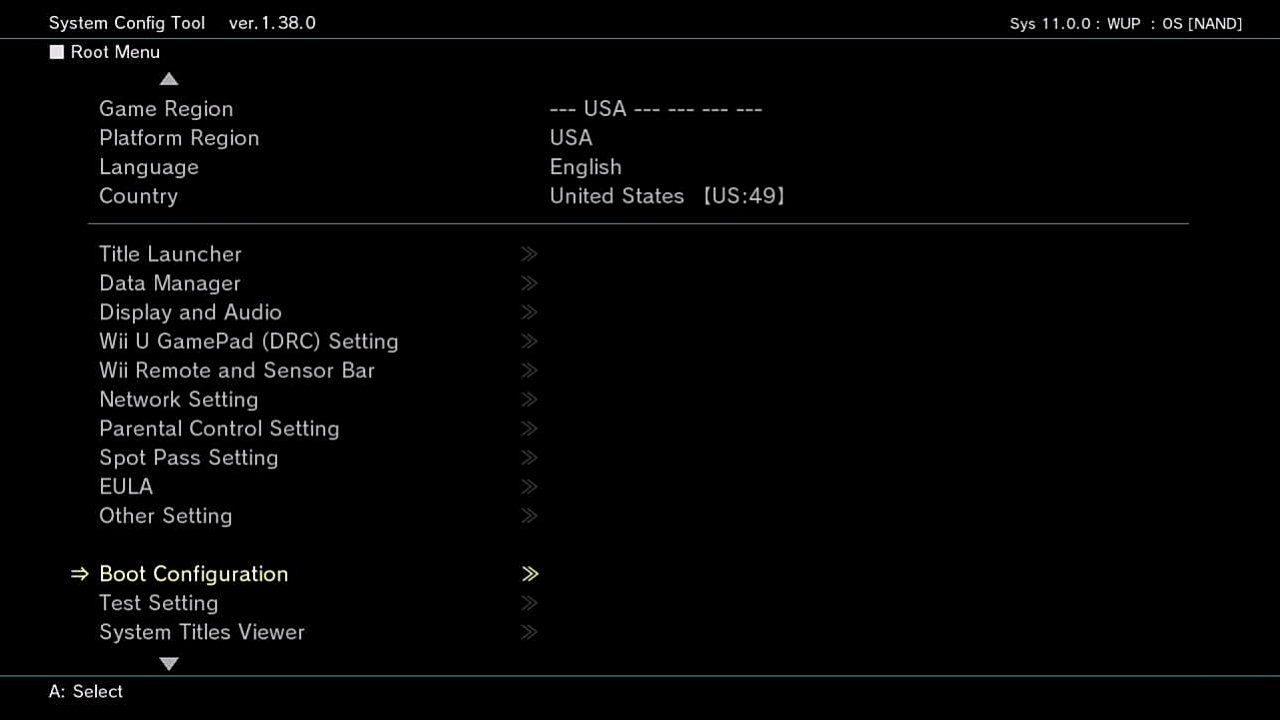
- Select Default Title.
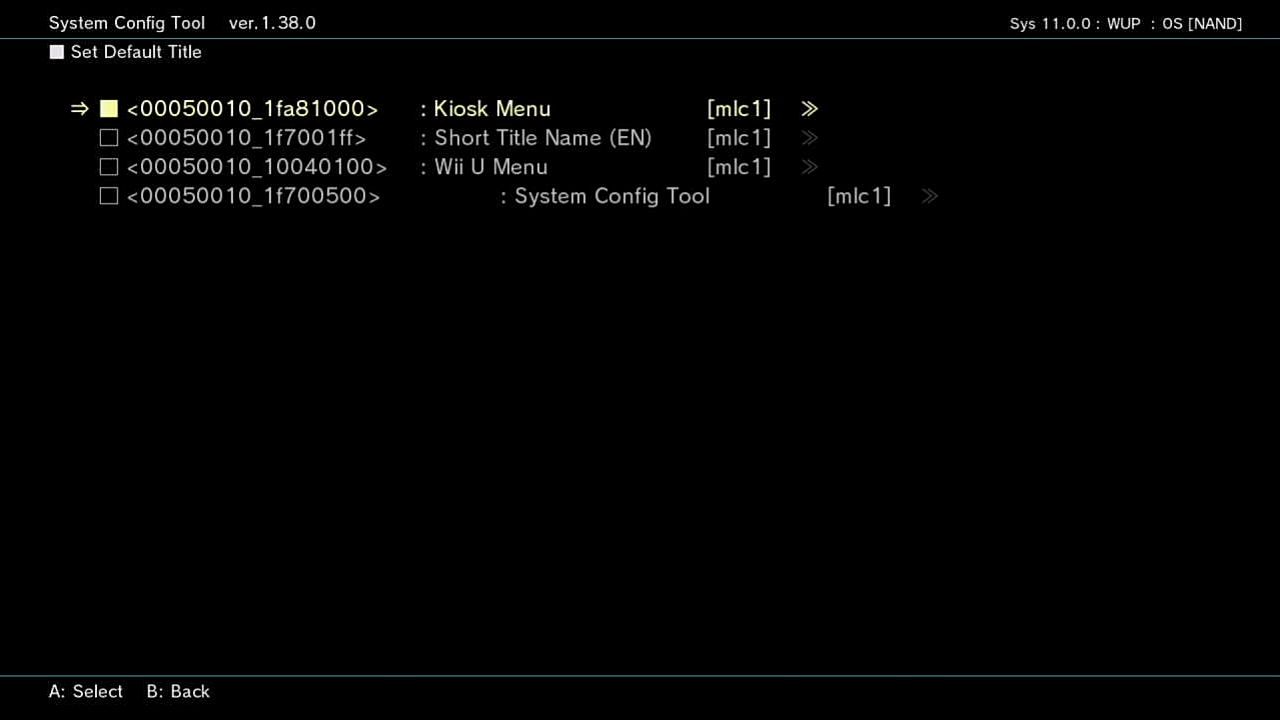
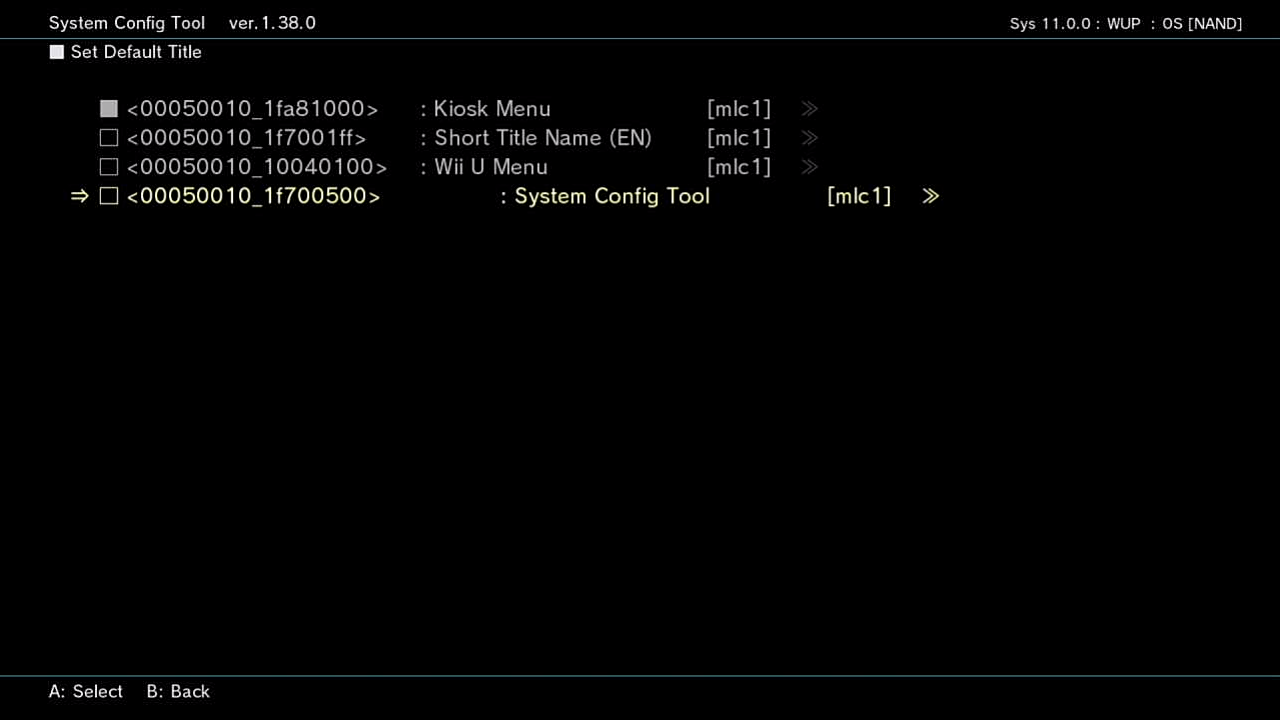
On this system, we have four Menus available: Kiosk Menu, DEVMENU (listed as “Short Title Name (EN)”), Wii U Menu (USA), and System Config Tool. - In the Default Title menu, select System Config Tool, press A to view title information, then press A to select.

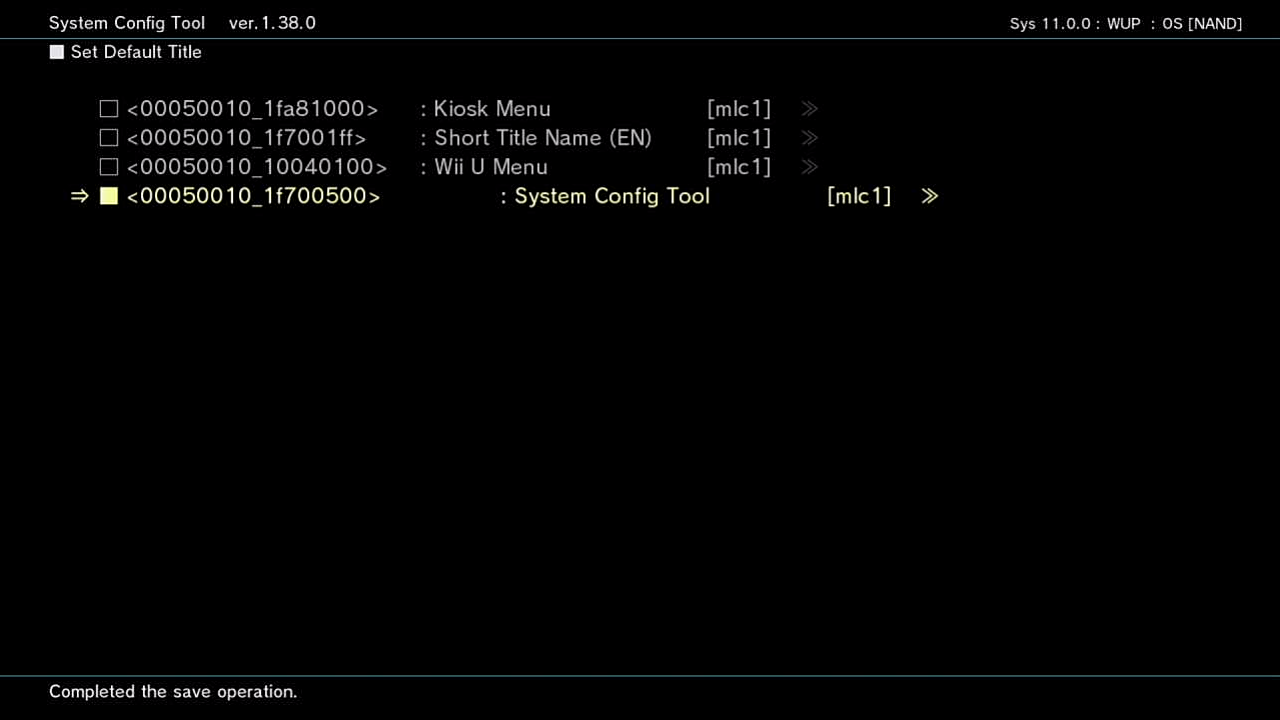
- Power-cycle the system. It should boot to System Config Tool instead of the Kiosk Menu.
Install Homebrew Launcher:
- On PC, extract the debug-signed version of Homebrew Launcher to the SD card.
- Also extract Wii U NAND Dumper to the SD card. This will be used later.
- Put the SD card in the Wii U.
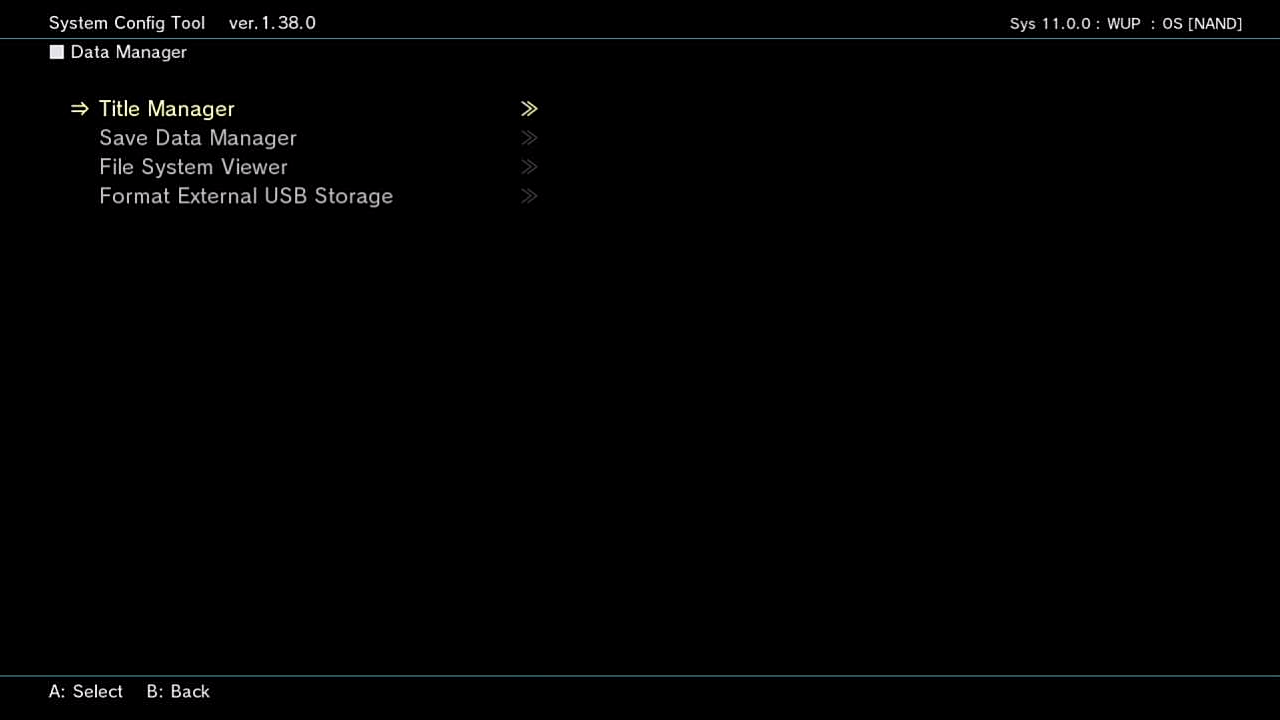
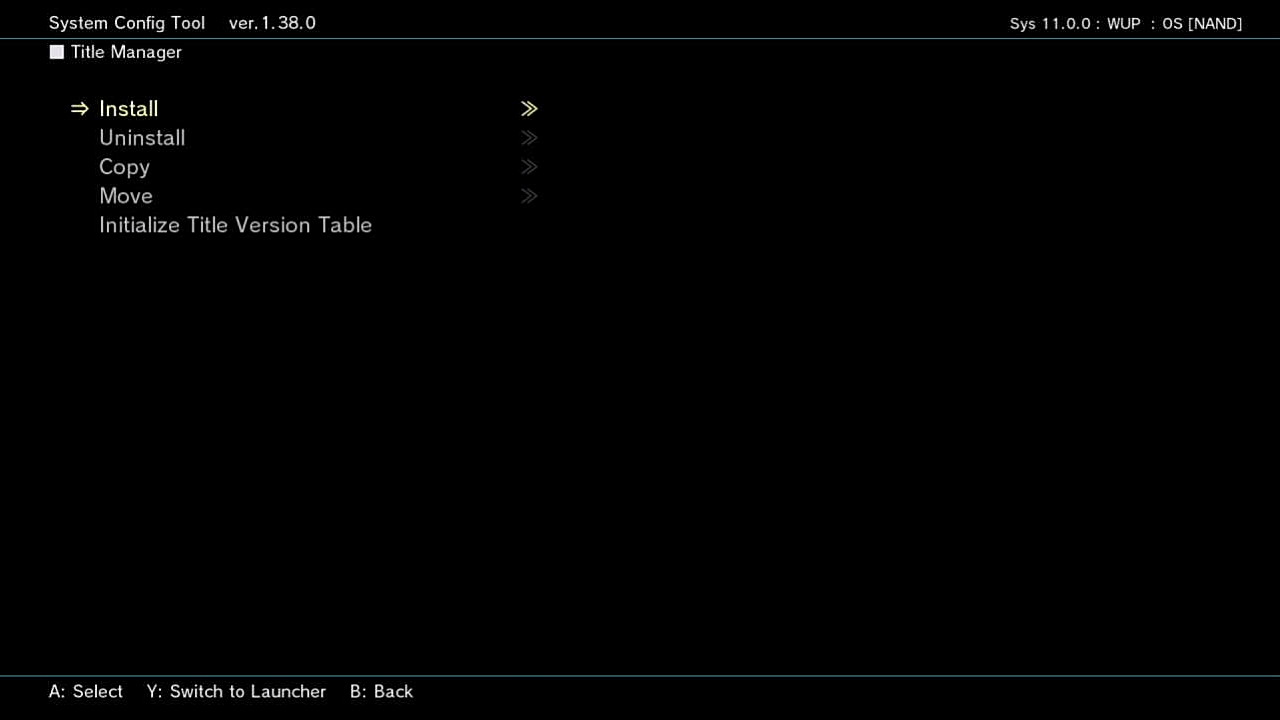
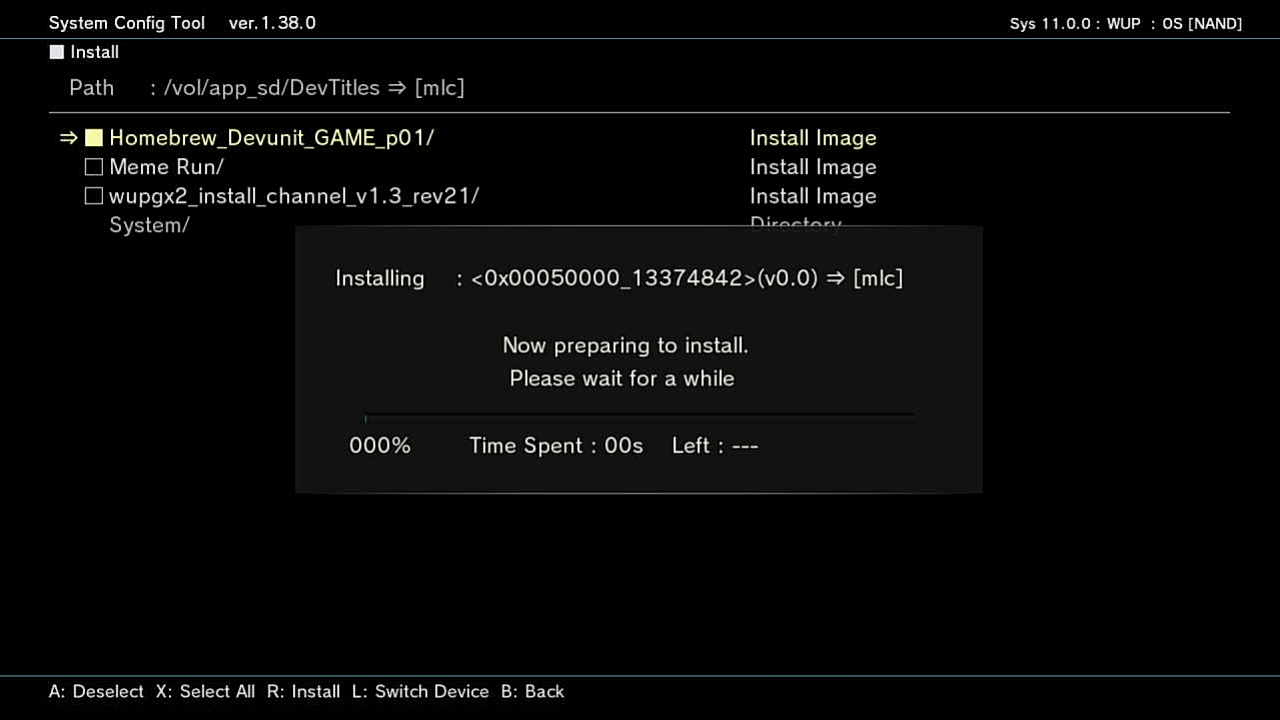
- In System Config Tool, select Data Manager, Title Manager, Install.
- Select SD Card, then browse to where Homebrew Launcher was copied.

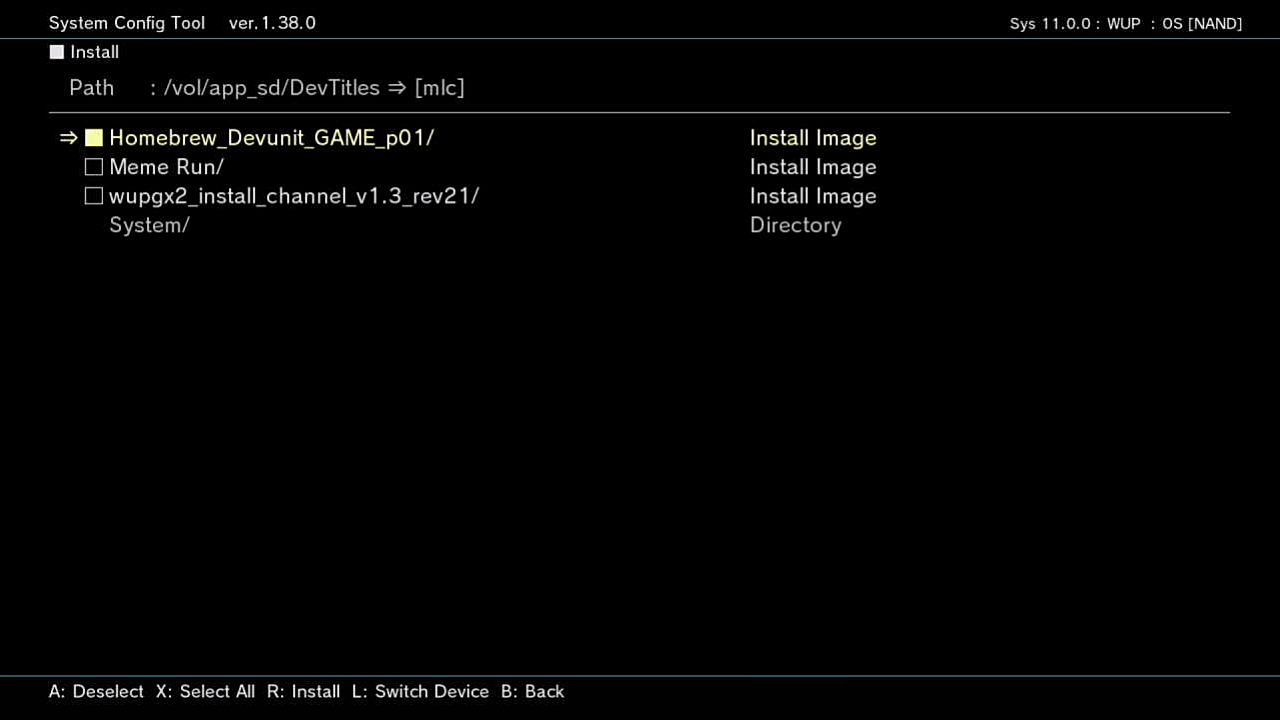
- Homebrew Launcher will be detected as an Install Image. Highlight it and press A to select the title for installation.
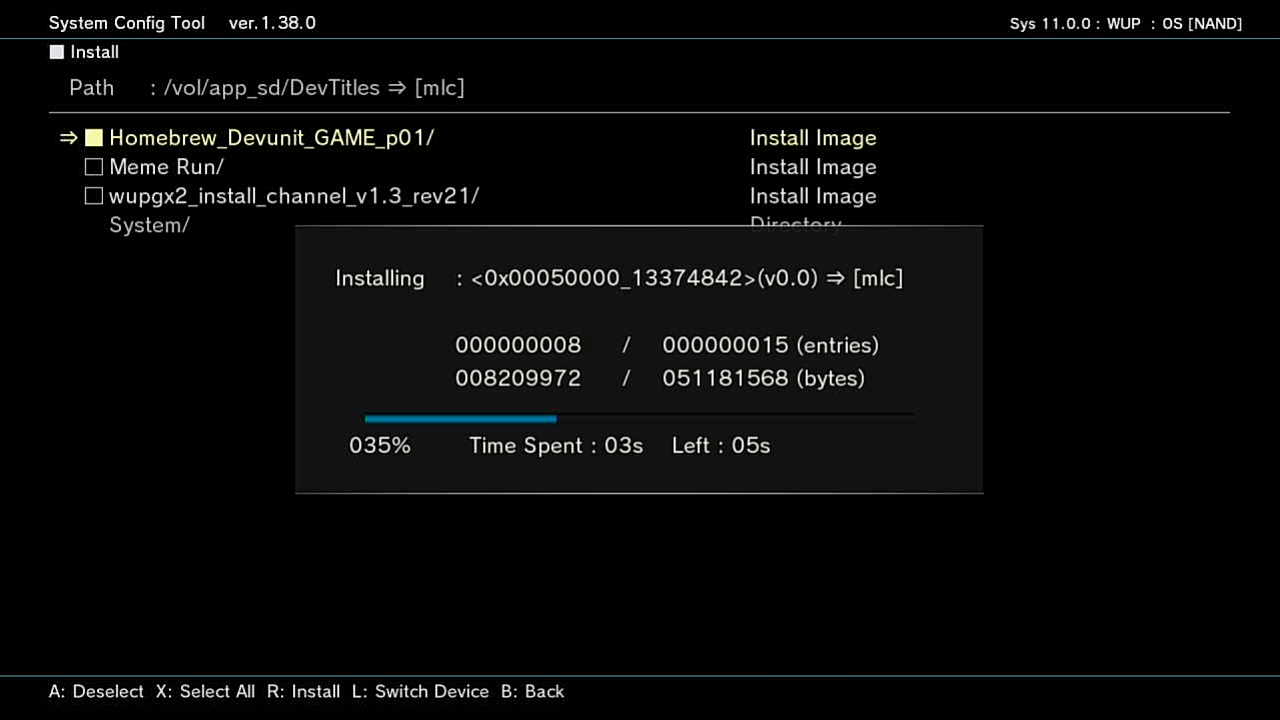
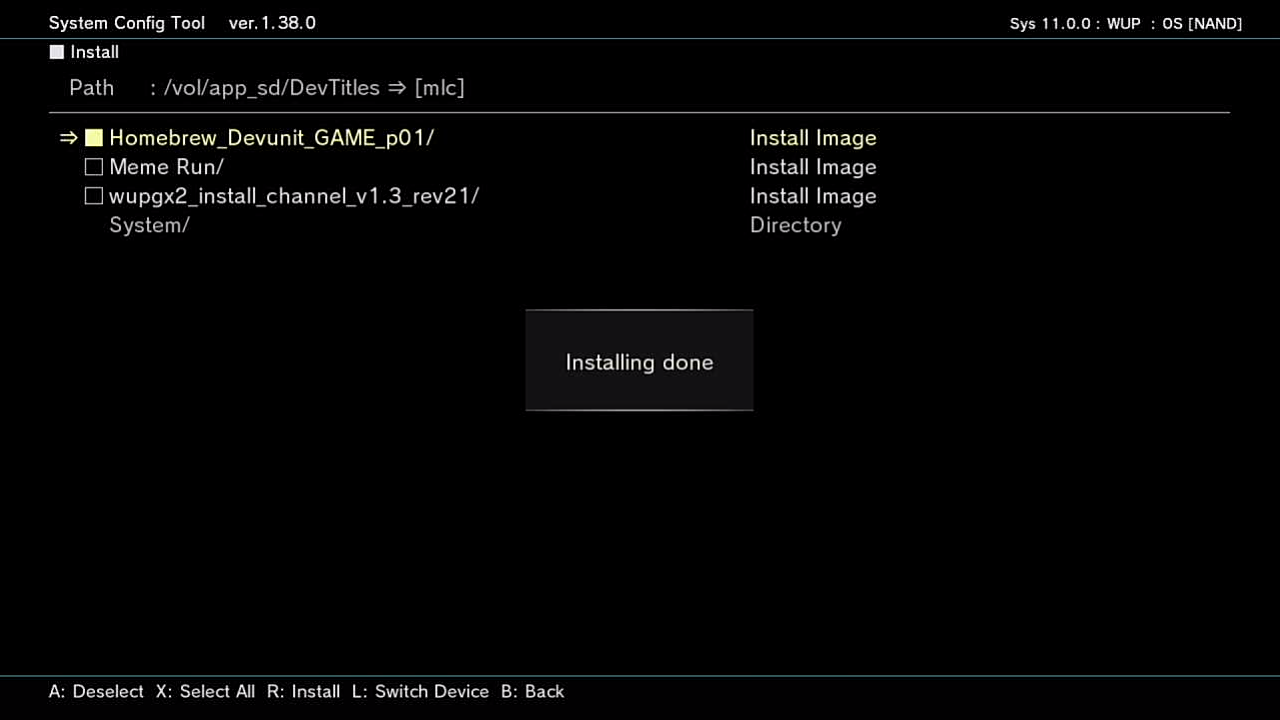
- Press R to install. Follow the prompts to continue installation.
If your system has SDK 2.12.12 and you have a copy of os_v10_ndebug from SDK 2.13.01:
- On PC, copy os_v10_ndebug to the SD card.
- Put the SD card in the Wii U.
- In System Config Tool, select Software Version Information to verify the installed SDK version.
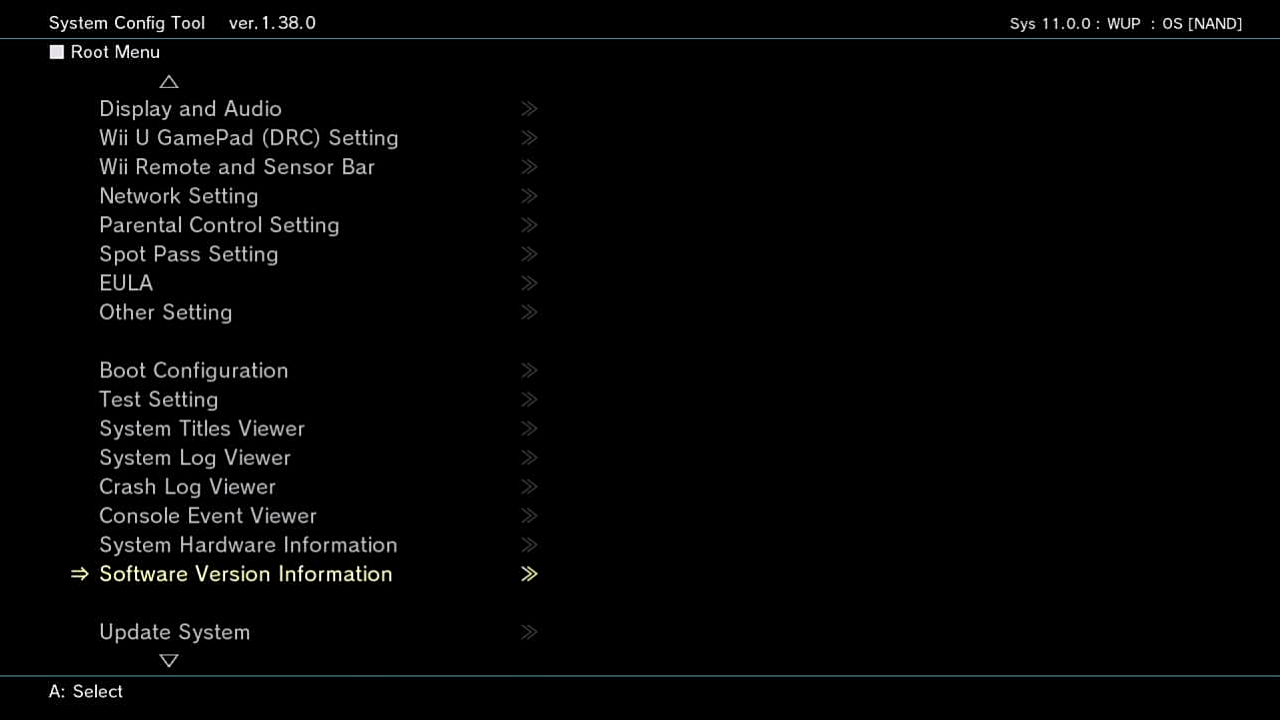
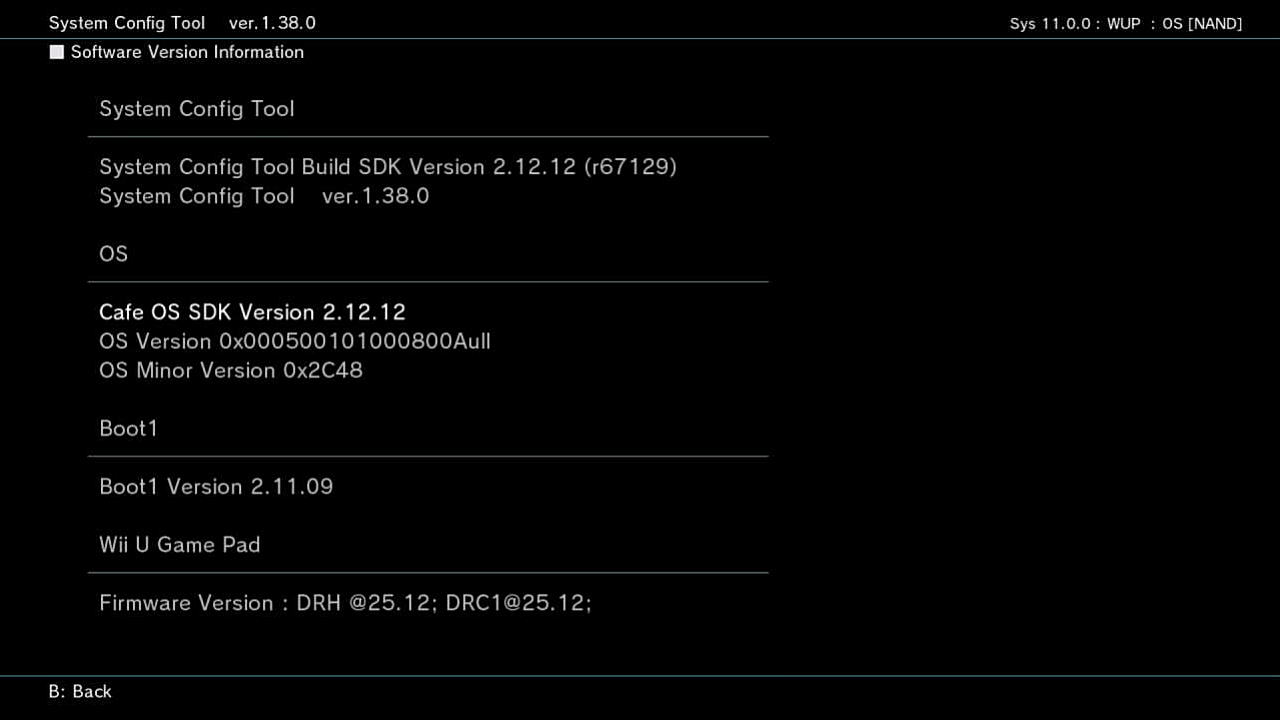
Here we can verify that the OS SDK version is 2.12.12. The OS title ID is below. Note that it seems to indicate we’re using the DEBUG version (800A), but it’s actually using the NDEBUG version (400A). - In System Config Tool, select Data Manager, Title Manager, Install.
- Select SD card, then browse to where
os_v10_ndebugwas copied.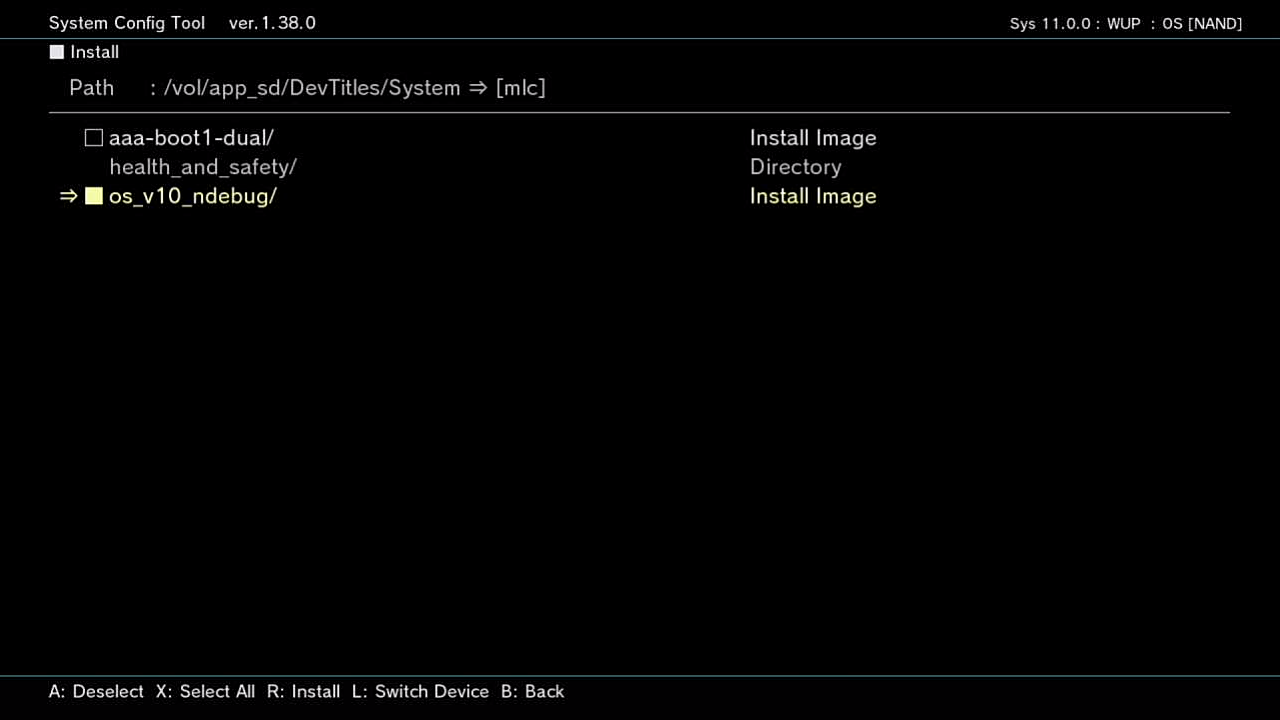
- os_v10_ndebug will be detected as an Install Image. Highlight it and press A to select the title for installation.
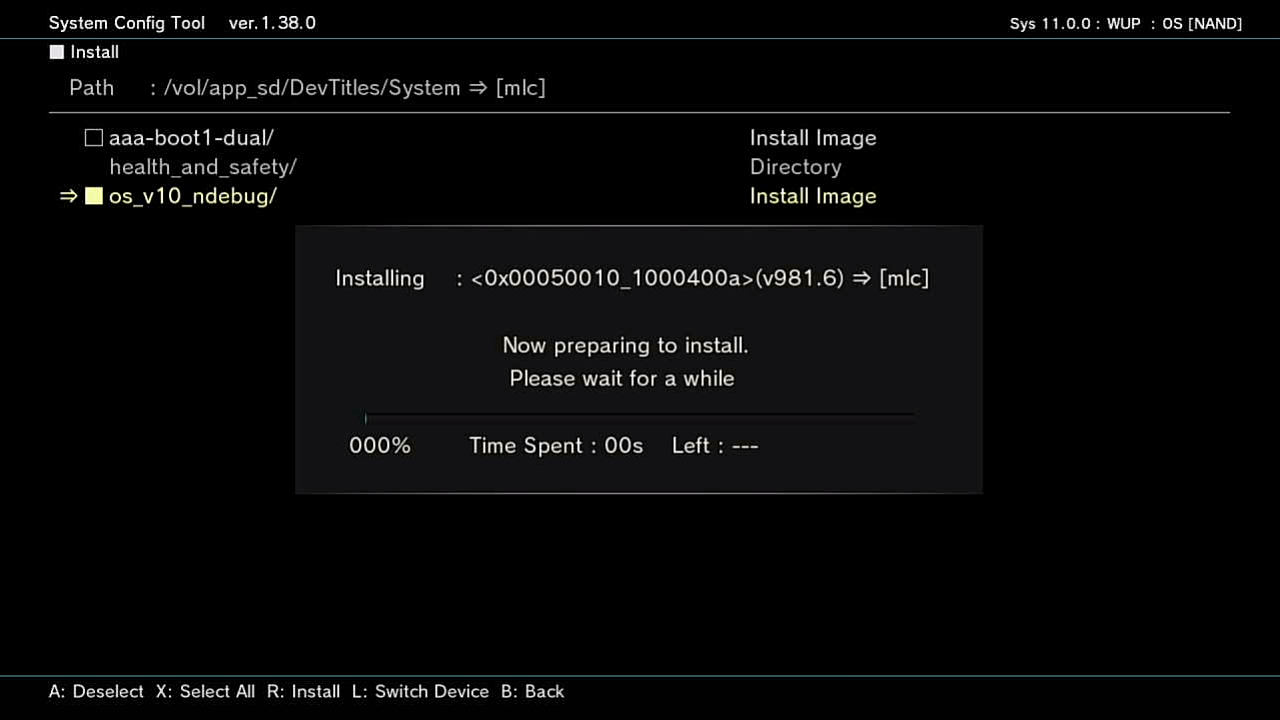
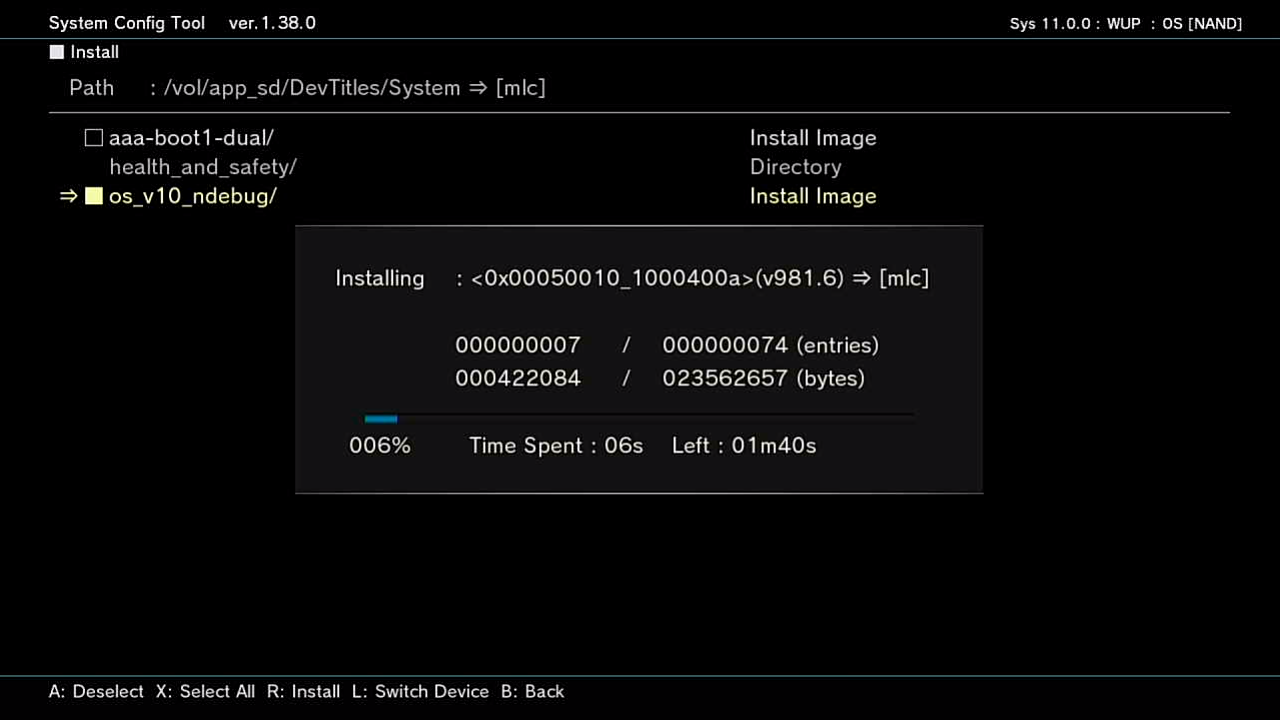
- Press R to install. Follow the prompts to continue installation.
- Power-cycle the system.
- Verify that
os_v10_ndebugwas updated by select Software Version Information and checking the SDK version. Here, we can see that the SDK version was updated to 2.13.01. (The System Config Tool version isn’t relevant here, since that applies to System Config Tool itself, not the OS.)
Wii U NAND Dumper
WARNING: This step requires changing the system mode to Production. After this setting is changed, DO NOT RUN ANY KIOSK TITLES. Doing so may result in Kiosk Menu being set as the default title, and cos shell will not accept any commands while in Production Mode. If this happens, and you have SDK 2.13.01 installed, you can use udpih to reset the startup title to System Config Tool.
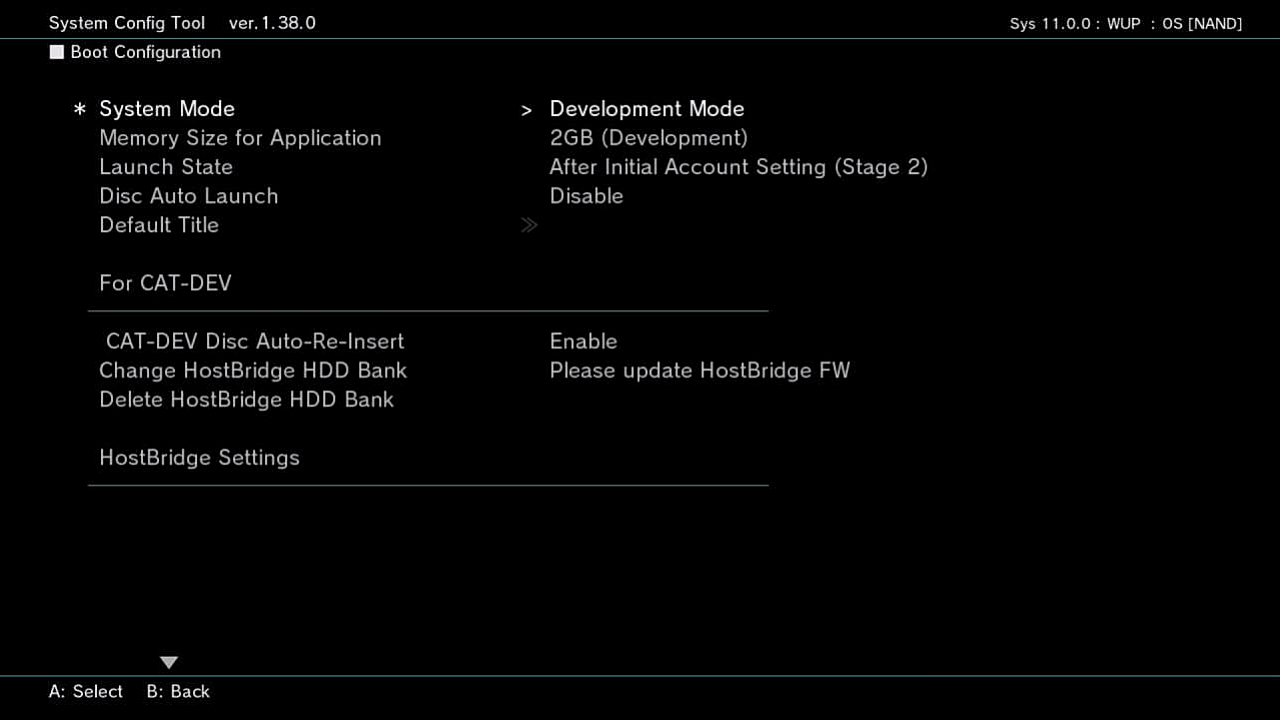
Set the system to Production Mode:
- In the System Config Tool main menu, select Boot Configuration.
- Set System Mode to Production Mode and save changes.
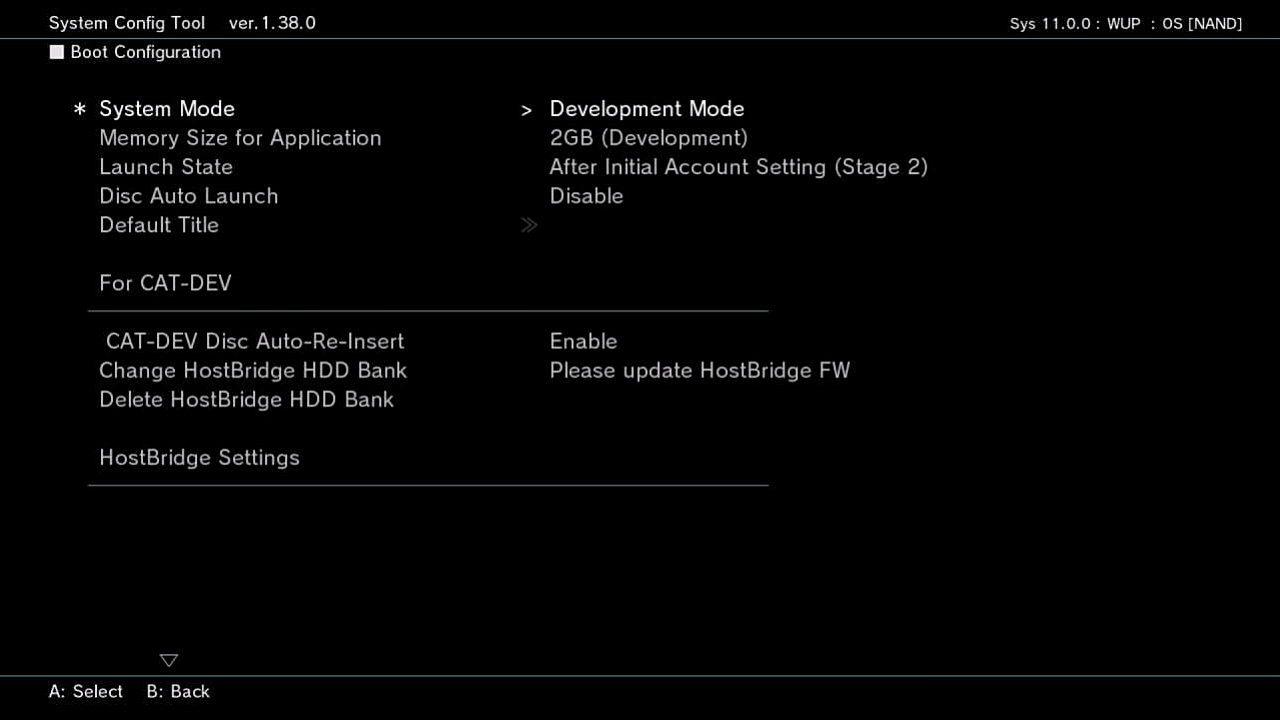
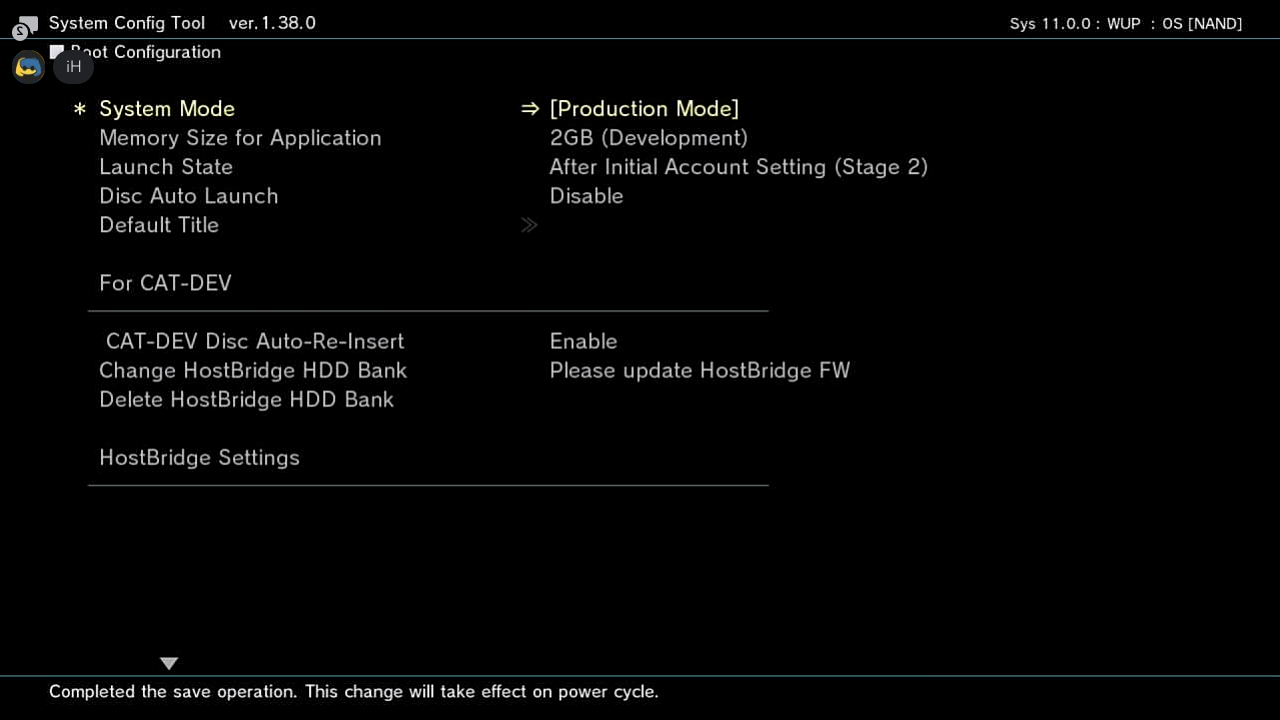
- Power-cycle the system. System Config Tool should load.
Run the Wii U NAND Dumper:
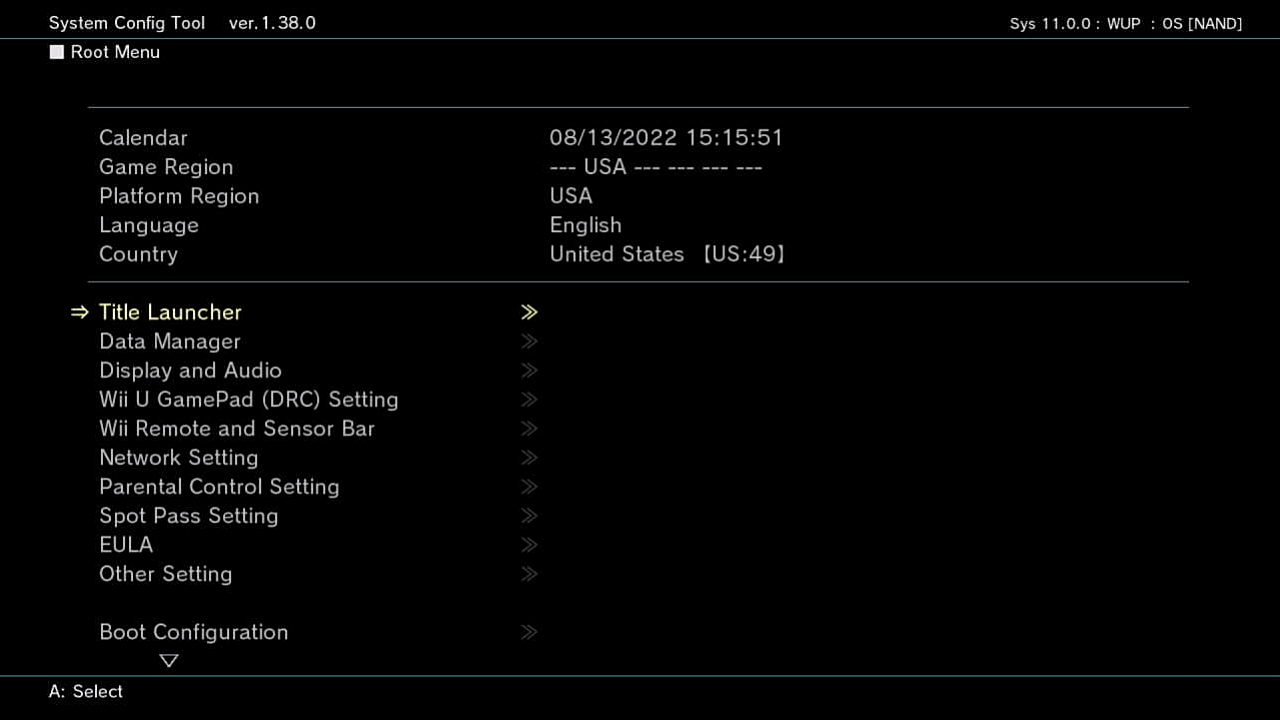
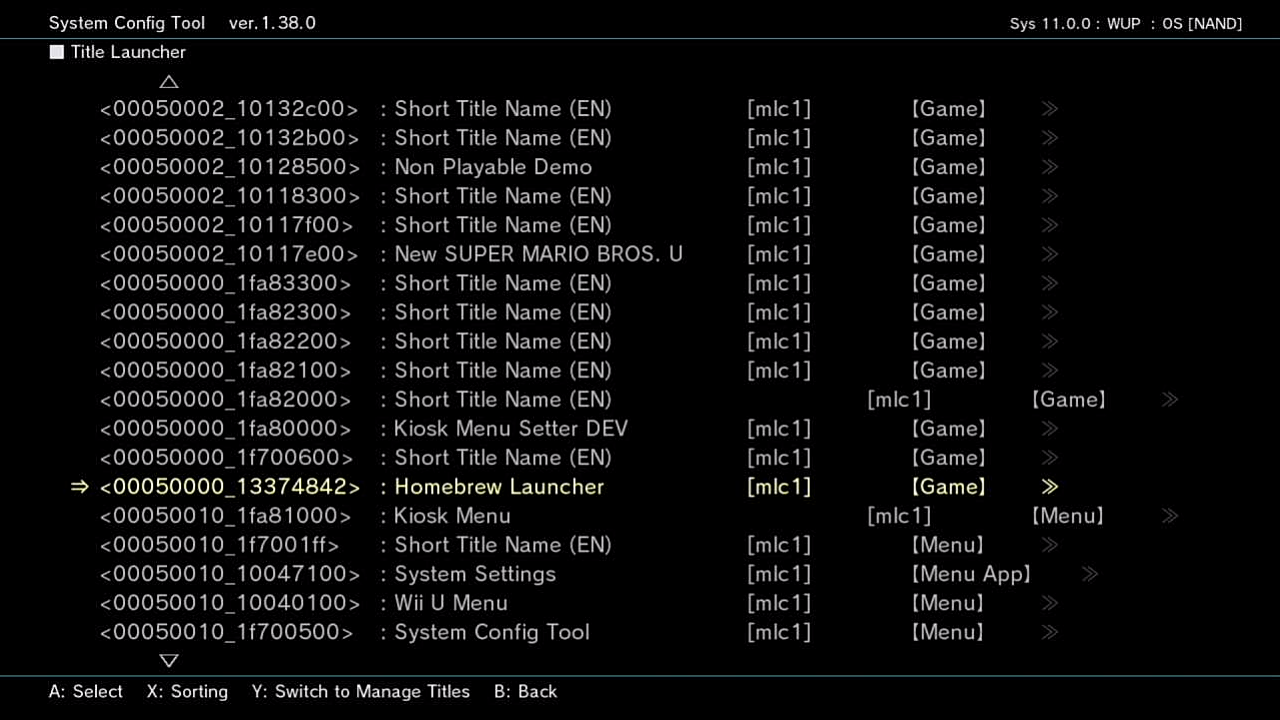
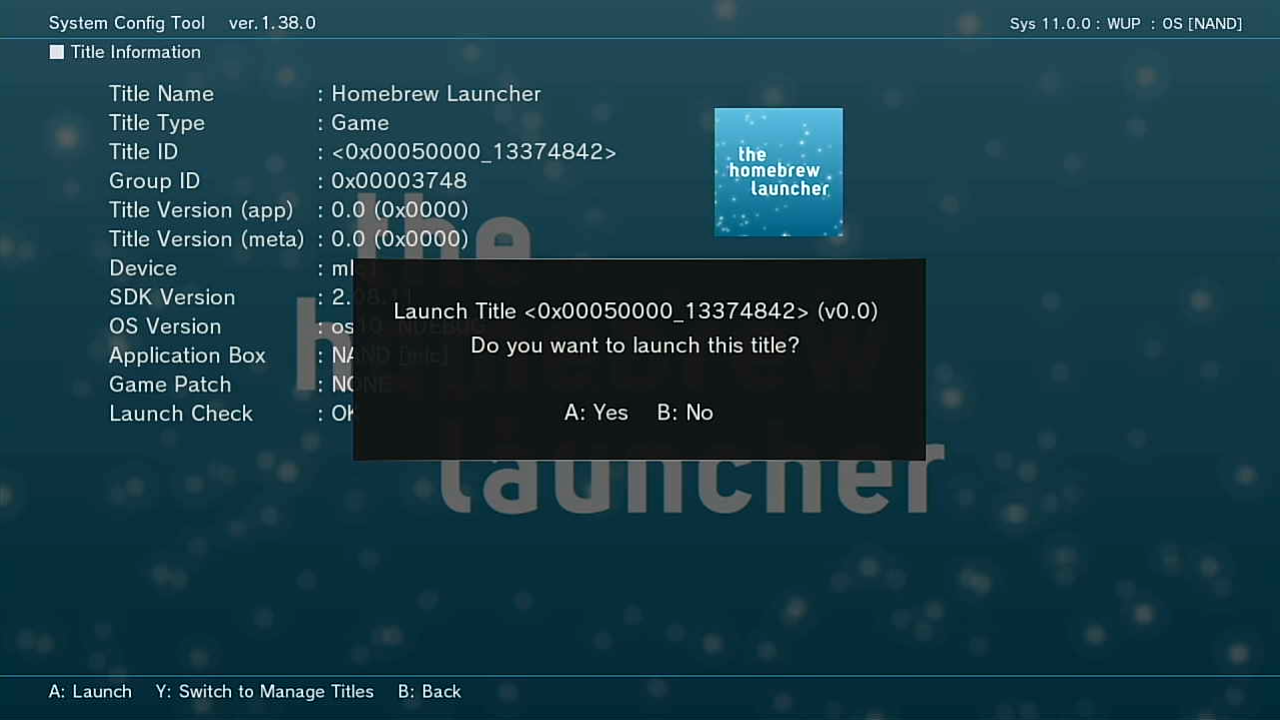
- In System Config Tool, select Title Launcher.
- Select Homebrew Launcher, press A to view details, then press A twice to load it.
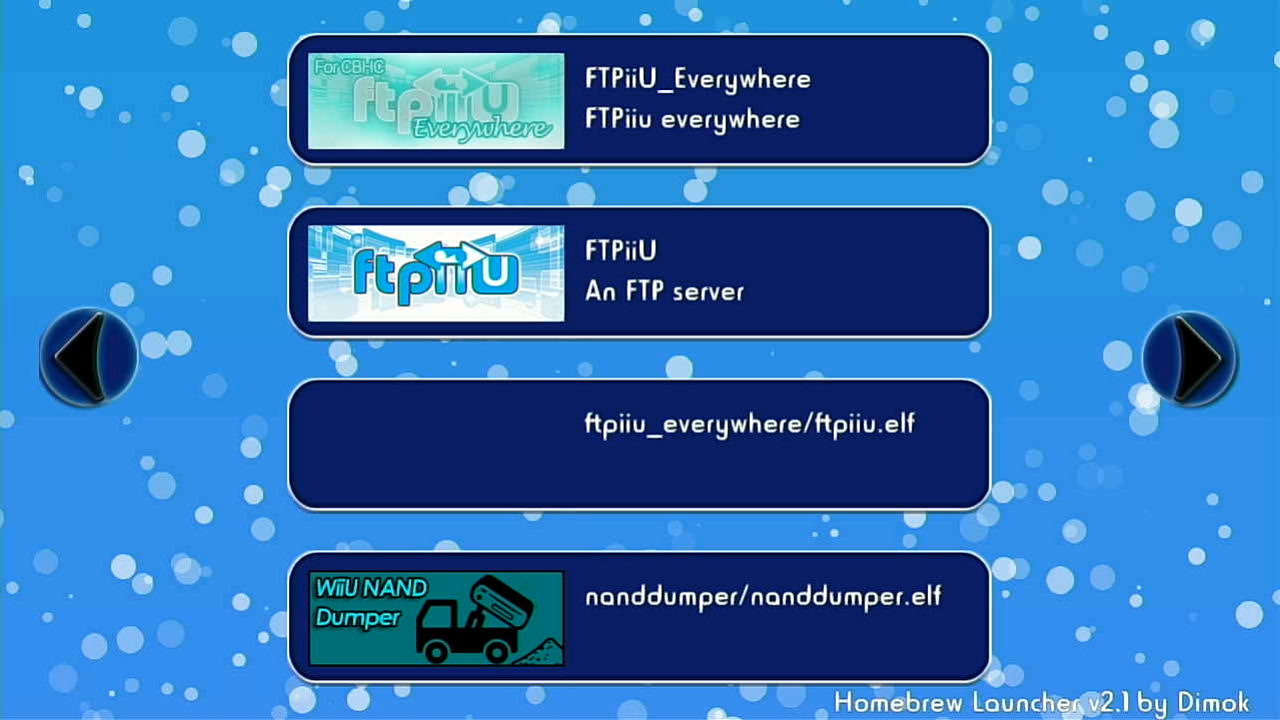
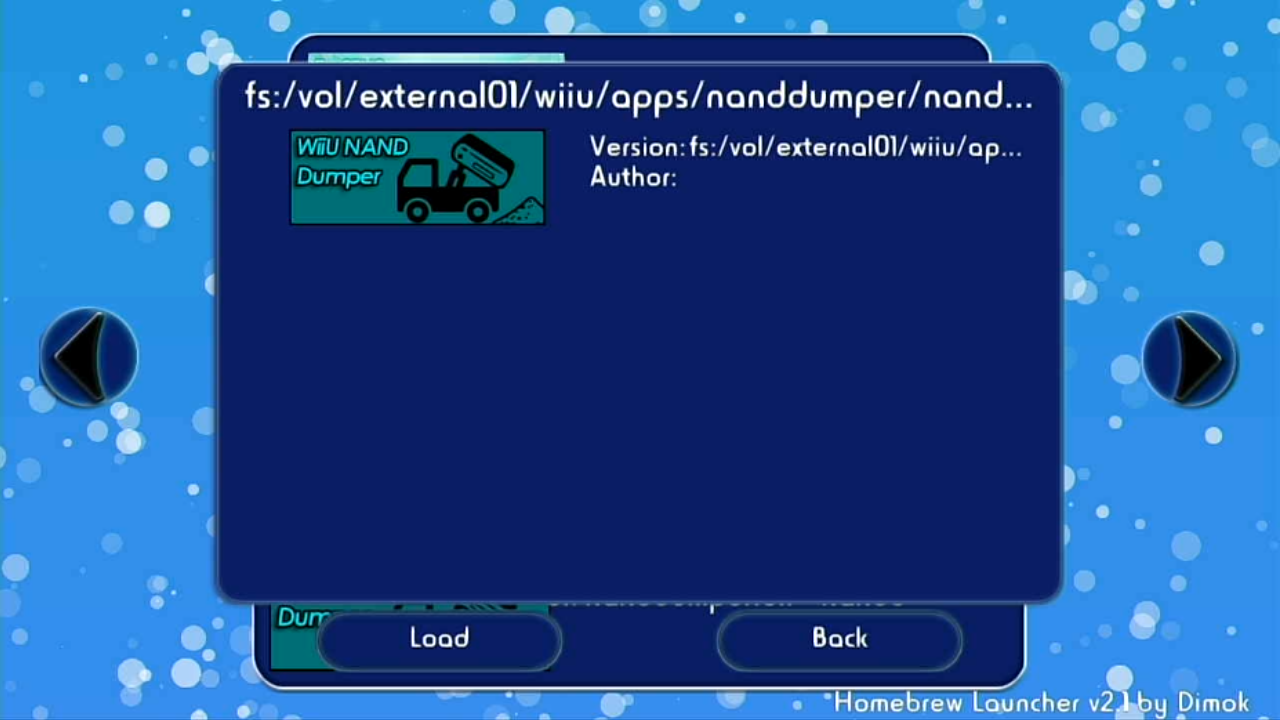
- In Homebrew Launcher, load Wii U NAND Dumper.
- In Wii U NAND Dumper, enable dumping of everything, including slc, slccmpt, mlc, otp, and seeprom.
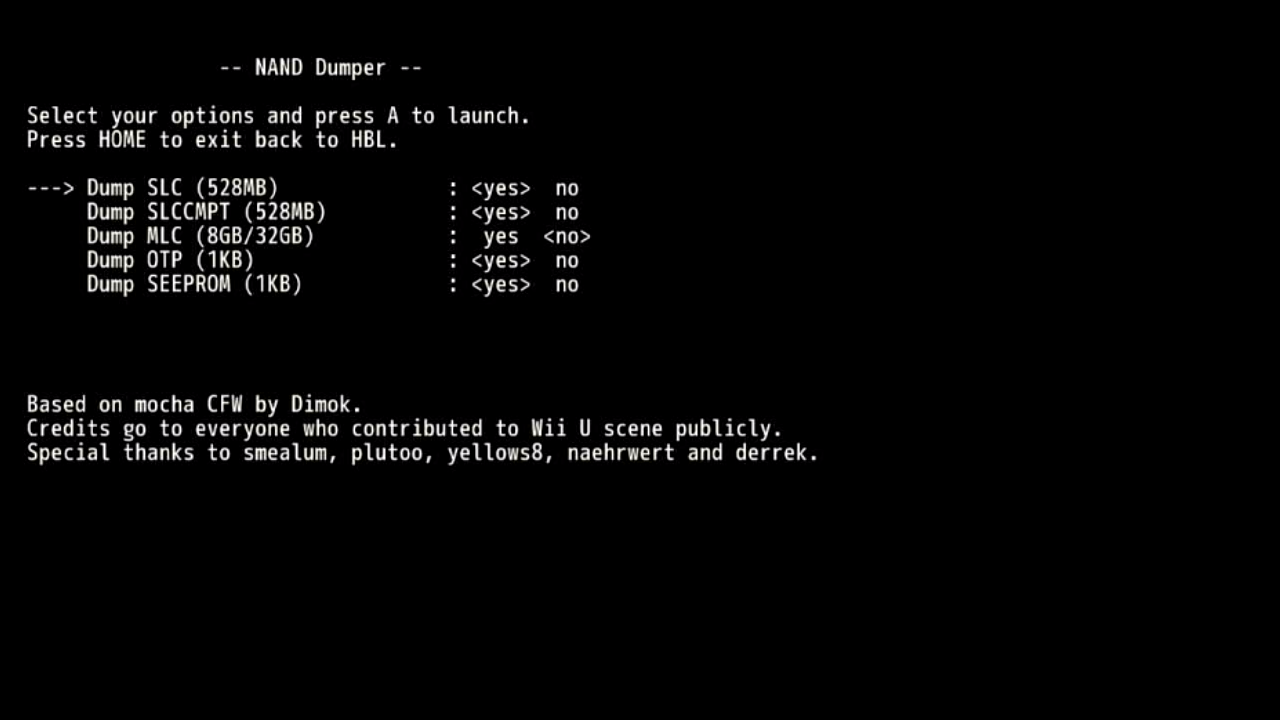
The default settings dump everything except MLC, so make sure you enable MLC dumping: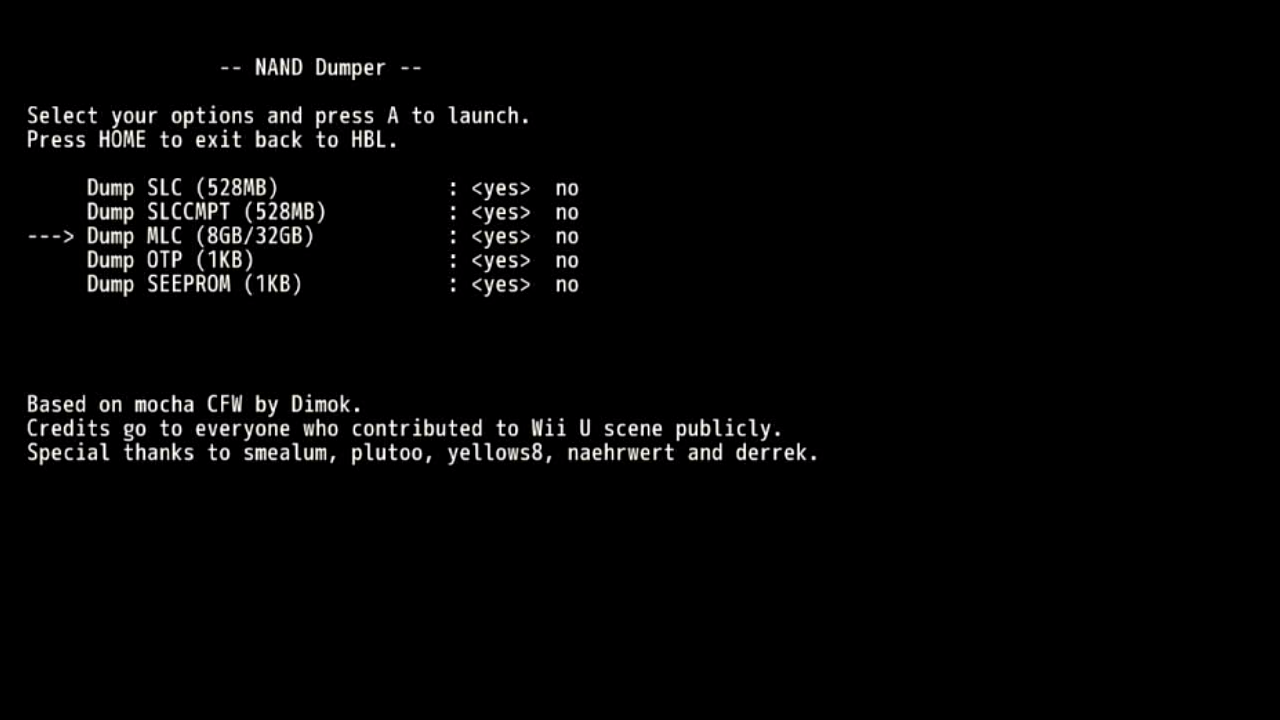
- Dump everything. The system will look like it’s rebooting, but a progress indicator will be printed on the gamepad screen. If it crashes instead of showing progress, make sure you set the system to Production Mode and try again.
Switch Back to Development Mode
After dumping the system’s NAND, put the system back in Development Mode to re-enable commands on the serial port:
- In the System Config Tool main menu, select Boot Configuration.
- Set System Mode to Development Mode and save changes.
- Power-cycle the system. System Config Tool should load.
Final Steps
Save the NAND dumps in a safe place for later use. You can use wfs-tools to extract files from the MLC dump and NUSPacker to build installable packages. (Note that NUSPacker doesn’t use the original ticket, and may need some adjustments to work properly with dev-signed packages, so it won’t be 100% identical to the original kiosk packages, but it’ll be close enough.)
As an optional step, you can flash SDK 2.13.01 and Wii U Menu Changer. This will wipe the system and effectively turn it into a standard devkit. This requires DDI recovery image files from the official SDK that cannot be linked here and are beyond the scope of this guide.
If you don’t want to wipe the system, you can keep System Config Tool as the startup title, or switch to Wii U Menu. Note that Wii U Menu might not load due to Kiosk Menu making some adjustments to the accounts, so you will need to set the “Launch State” option in Boot Configuration to Stage 0. This will tell Wii U Menu to initialize user accounts. Do note that launching Kiosk Menu will erase the user accounts again, so switching back to Wii U Menu may require setting “Launch State” back to Stage 0 again.
24 responses to “Dumping Wii U Kiosk Systems without Hardmods”
Hey bud please contact me at my email.
I just noticed comments need approval before posting so I’ll ask my question here. I downloaded 2.13.01 off of archive.org, out of curiosity, where the hell is the cat-r updated file? Does the sdk need to be installed first or something? I was wondering if it unpacks it or something during installation. wiiu files were all taken down from the portal. Email is [redacted]
Here’s a list of the updater files. The ZIPs contain a DDI, which you’ll need to DD to an SD card. You’ll want to run the base CAT-R Updater first (which *will* wipe the system), then one of the Wii U Menu updaters. (I didn’t see any of these on archive.org, though…)
WiiU-CAT-R_Updater-2_13_01-20150728.zip
SHA256: 506d3f8bfe4b76af76bc0dfe9ccbbadd80a200e976d8bbf8bb931c79c37ddb55
To install Wii U Menu:
WiiU_MenuChanger-2_13_01-20160112-EU_en.zip
SHA256: f79e9f87eb50c0907eced48d609dcbbd93d508837d97c1aa6462df6020b13844
WiiU_MenuChanger-2_13_01-20160112-JP_en.zip
SHA256: 389d06cfe2ba14dc7d6bdd966ca2b72a7017ee3c0d2690969e3f6a374d83c64e
WiiU_MenuChanger-2_13_01-20160112-US_en.zip
SHA256: e8718df56a9303b88a980ed8dcc454e8263f034679329762e4d962adca87d811
What’s up friends, I can’t find the files anywhere and I don’t know how to decrypt sha256 can you please send me your files in advance thanks and happy holidays
We use DeepL translation.
Please advise me as I am stuck.
I am able to send commands from TeraTerm by connecting CAT-I to my computer with a serial cable, but when I send cos shell, it only returns ‘#’ The SDK version is 2.13.01. Also, the following log is being output repeatedly without stopping. What should I do?
—
01:12:16:956: IFNET_ETH: Link DOWN.
01:12:16:960: NET: Change admin state (1 -> 2)(iface:1 link:2)
01:12:16:961: IFNET_ETH: Configuring link adminState to DOWN.
01:12:19:961: NET: Change admin state (2 -> 1)(iface:1 link:2)
01:12:19:961: IFNET_ETH: Configuring link for auto negotiation – flowControl=ON.
—
IFNET_ETH is likely referring to a USB Ethernet adapter. The system might be configured to use one, so if you don’t have one connected, it’s getting confused.
cos shell only returning ‘#’ most likely means the system is set to Production mode. If you have a Raspberry Pi Pico or hacked Nintendo Switch available, you can try using udpih to change the startup title: https://github.com/GaryOderNichts/udpih
Thanks for the reply!
I was able to successfully launch the System Config Tool using the method you taught me!
i got the ddi but do i NEED the menu changer? also how does one use the ddi. if i put it on root and try to update from config tool it doesnt detect?
The basic SDK DDI will install the main OS and System Config Tool, but not a Wii U Menu. The system is fully usable in this configuration.
Do note that flashing the SDK DDI *will wipe the MLC*, which defeats the purpose of this guide.
In order to run the DDI, you need to use a tool to write it to the SD card as a raw image. On Unix/Linux systems, `dd` or `ddrescue` works here. HDDRawCopy may work for Windows. After writing the raw image to the SD card, put it in the Wii U, then power on the Wii U by pressing both Power+Eject. The power light will turn orange, and you should get the MCP Recovery environment, which will then load the DDI, wipe MLC, and install the OS.
I’m stuck in production accidentally ran a kiosk title instead of hbl. Now I get a white screen with console log sdk version 2.12.13 I used etcher.is nix needed?
Unfortunately since the system has 2.12.13, you can’t use udpih+recovery_menu, since that only works with 2.13.01.
There’s a Windows build of dd available, and instructions on how to use it are available here: https://www.trishtech.com/2022/01/how-to-use-dd-to-make-usb-drive-image-on-windows/ – the instructions are specifically for copying a USB drive to an image, so you’ll want to reverse the parameters to copy an image to an SD card:
dd if=wiiu-2.13.01.ddi of=\\.\X: bs=10M –progress
where X: is the drive letter for your SD card reader. (Make sure you use the correct drive letter!)
Again, do note that running the 2.13.01 DDI will wipe the system’s MLC, but it will at least allow you to make use of the system again. Flashing just the base 2.13.01 will get you to System Config Tool with no Wii U Menu or anything else.
Nvm it was Balena. Hddrawcopy works. U rock!
Can’t find the stupid menu… 🙁 shoot me a email please.
I need the device link before it goes down for good.
Can one dump the menu from a real cat?
found these for if people just wanna go straight to dev. i personally have latest menu and update but im sure these could help someone. its from 2015 so its probably .12 atleastif someone needs to upgrade or stuck in kiosk this will fix it. also if someone wanted to copy a game from a unit how does one do so? i have a build of a game from a studio i worked at id like to perserve.
You would need to dump the MLC contents as files, then use NUSPacker to repack the files into an installable package: https://github.com/ihaveamac/nuspacker
The guide above should help you with a full MLC dump, and then you can use WFS Tools to extract from the MLC: https://github.com/koolkdev/wfs-tools
NUSPacker doesn’t use the original ticket, which shouldn’t be an issue, but it might have some issues due to dev-signing.
https://archive,org/details/wii-u-operating-system
your rvhtool dev signs right? also can coss shell be dumped for re? there may be more hidden commands
i have a devbuild of a game i was able to pull off this cat-r (which btw works for dumping some of this stuff too if you can launch browser which im almost positive you can. however im having an issue with install i get a MCP INSTALL RVAL -265150 ES_ERR_VERIFICATION i feel like this is a key thing?
thats if i use gui. if i do it manually i get a strange size error of not having enough room which is not true.
C:\Users\Nasri\Desktop\rvt>rvthtool –recrypt=2f5c1b2944e7fd6fc397964b057691fa dtw/title.cert
RVT-H Tool v1.1.1
Copyright (c) 2018 by David Korth.
rvthtool: unknown encryption key ‘2f5c1b2944e7fd6fc397964b057691fa’
Try `rvthtool` –help` for more information.
C:\Users\Nasri\Desktop\rvt>rvthtool –recrypt=30bfc76e7c19afbb23163330ced7c28d dtw/title.cert
RVT-H Tool v1.1.1
Copyright (c) 2018 by David Korth.
both wiiu and wii debug common key give this error. your istructions are not clear on wiiu nus resign
rvthtool doesn’t support Wii U packages. The current git master build includes a tool called “wupresign”, which does support Wii U packages. The keys are included, but when using NUSPacker, you need to use the Wii U dev common key, which starts with 2F5C.
I still haven’t released a ‘stable’ build of the rvthtool packages that includes wupresign, so you can either build it from source, or use an AppVeyor artifact: https://ci.appveyor.com/project/GerbilSoft/rvthtool/build/job/hhxhnuas3e2lkjyb/artifacts
The build job does not contain any artifacts.